
Keep the chapter you need open
Open only your current chapter below. Tick it after clearing it; the tick is your own note, not a connection to the game save. The collectible count is a separate check before leaving a chapter.
Your checks are saved in this browser. This checklist does not sync with the game.
| Done | Chapter | Collectibles |
|---|---|---|
| 1 · Bravo Squad | 5 | |
| 2 · Hold the Line | 27 | |
| 3 · No Gear Left Behind | 5 | |
| 4 · Flyboys | 0 | |
| 5 · Overrun | 1 |
Keep the Act 2 collectible checklist beside this route. For upgrade rewards and optional rescues, use Hard Cases, Supply Caches and secondary objectives.
1 · Bravo Squad
Story spoilers · open to readOpen Bravo Squad: route, encounters and pickup pauses
Reported bridge route: the first controls fail. Take the upper Skytrain route to support Charlie, descend to the other control room, lower the center span and clear the remaining attack.[4]
The firsthand bridge guide confirms the control rooms and upper route supporting Charlie.[3]
Xbox Wire’s playable preview records Captain Akila Grey’s briefing and the bridge mission.[5]
Treat the failed first console as the cue to read the next objective. While providing support from above, watch Charlie’s fighting lane before dropping to a lower route.
2 · Hold the Line
Story spoilers · open to readOpen Hold the Line: route, encounters and pickup pauses
At Oria Stadium the playable preview introduces Tai’s Chainsaw Lancer, the tourist-map exploration system, Supply Caches, Weapon Mods and the rail-station battle.[5]
| Stage | Route / unlock cue |
|---|---|
| Station | Secure Octus Way; continue into the map area. |
| Muster point | Investigate the objective; the Bilefrog encounter begins here. |
| Amberstone → Mags | Storage precedes Find Mags’ Meds; complete the apartment scene. |
| Bank | The main objective opens the vault; map visibility alone does not open it. |
| Charlie → next district | Link up with Charlie opens the previously closed camp gate. |
| Whiskey / hotel | Search the marked area, then enter the Kalona Hotel when its main objective is active. |
Reported final step: defend the hotel communications position until its relay task finishes.[4]
Optional rescues include Trapped Family, Apartment SOS, Lost in Translation, Family Reunion, Black Raven Down and Lone Wolf. Lone Wolf becomes available after the courtyard objective.[3]
For Explosive Indigestion, Adam Stewart landed a Gut-Puncher round in the Bilefrog’s glowing open mouth during Lost in Translation. He reports uncertainty about whether the shot must also kill it.[6]
See the Bilefrog combat guide for its actual mouth-opening image and the achievement attempt sequence.
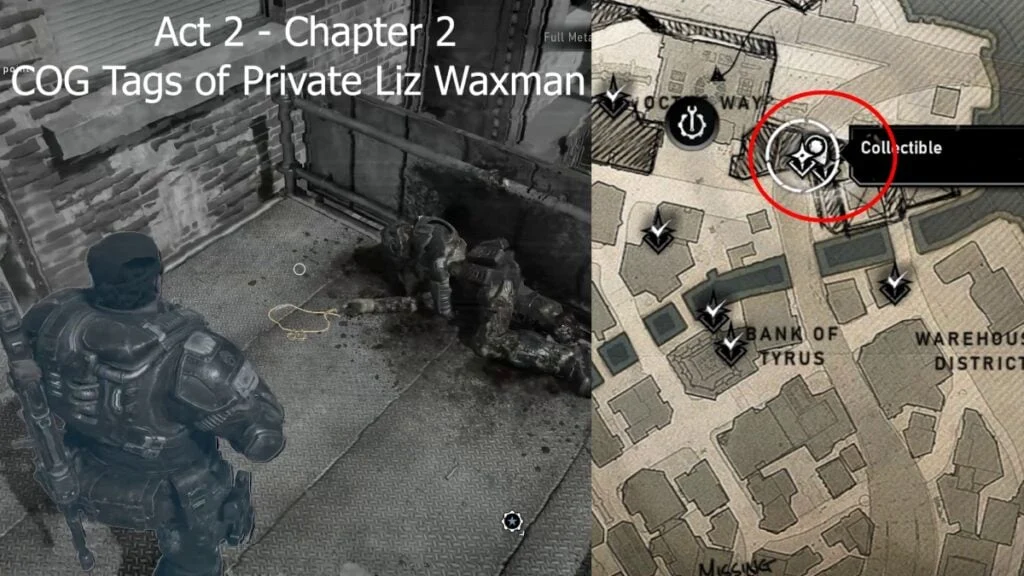
Apartment / scaffolding pause
A pickup detour, not the mandatory route through the whole district.
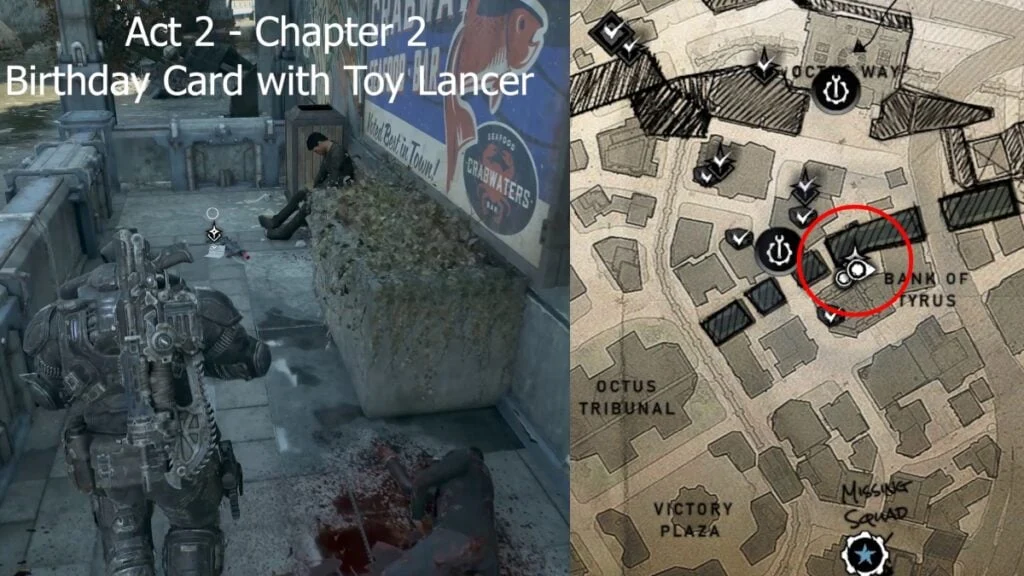
Riverside pause
Check the collectible checklist while the map district is open.
Use the changing objective text as your route checkpoint. Before a camp gate or district transition, check unfinished rescues and your named pickups; repeated sightseeing is less useful than checking what the journal still lacks.
3 · No Gear Left Behind
Story spoilers · open to readOpen No Gear Left Behind: route, encounters and pickup pauses
Reported route: Charlie’s last signal sends Bravo east. Take the subway tunnels toward the rescue encounter; the route then moves toward air transport.[4]
The firsthand route records tunnel fighting and an Impaler scene before the next tunnel. Use the chapter’s five named collectible checks rather than the much larger Hold the Line total.[2][3]
Resupply before entering a sustained tunnel encounter. A narrow corridor leaves fewer escape directions, so keep sight of the nearest piece of solid cover while advancing.
4 · Flyboys
Story spoilers · open to readOpen Flyboys: route, encounters and pickup pauses
Reported route: use the Raven’s mounted weapon during the flight and engage the firing positions called out by the crew until the airfield approach completes.[4]
Follow crew callouts and the immediate threat to the aircraft. The empty collectible count gives you permission to concentrate on the flight encounter.
5 · Overrun
Story spoilers · open to readOpen Overrun: route, encounters and pickup pauses
Reported route: the airfield defense keeps falling back through the hangar and toward the western control tower; follow each new rally position through the failed extraction.[4]
After the warehouse battle, the blown-out wall is the route forward. The hangar pickup pause is beside its Supply Cache.[2][3]
A new fallback order takes priority over holding the last firing position. Check nearby supplies while moving with the squad, then read the next objective.
What this route establishes
Reported routes come from Whisper’s illustrated guide: its author and difficulty are unstated, and its sourcing policy allows research alongside gameplay. Named firsthand guides support the separate encounter and pickup notes.[8]
Hold the Line has additional local firsthand evidence for the apartment, bank, camp gate and optional objectives. Flight targets, airfield fallback timing and enemy-wave counts remain reported rather than independently measured.
Advice labelled Editorial is our planning suggestion. It does not establish a required weapon, a fastest route, an enemy health value or a difficulty-specific strategy.
Sources & further reading
- Published campaign order: all acts and chaptersWhisper of the House · October 2, 2026
- Act 2 collectible walkthrough (German)Gameswelt · Denis Lucius Brown · October 2, 2026
- Act 2 collectibles, Hard Cases and secondary objectives with gameplay screenshotsGamer Social Club · Adam “Addy” Stewart · October 1, 2026
- Published illustrated Act 2 route (playthrough author not identified)Whisper of the House · October 2, 2026
- E-Day campaign hands-onXbox Wire · August 25, 2026
- Firsthand Bilefrog mouth-explosive achievement methodGamer Social Club · Adam “Addy” Stewart · October 1, 2026
- Act 2 collectible locations with gameplay screenshotsThe Nerd Stash · Julio La Pine · October 1, 2026
- Publisher editorial and sourcing policyWhisper of the House