
Keep the chapter you need open
Open only your current chapter below. Tick it after clearing it; the tick is your own note, not a connection to the game save. The collectible count is a separate check before leaving a chapter.
Your checks are saved in this browser. This checklist does not sync with the game.
| Done | Chapter | Collectibles |
|---|---|---|
| 1 · Hope and Ruin | 13 | |
| 2 · Technical Difficulties | 2 | |
| 3 · Tough as Nails | 14 | |
| 4 · Signals | 5 | |
| 5 · Paths Diverge | 2 | |
| 6 · Critical Failure | 5 |
Keep the Act 4 collectible checklist beside this route. For upgrade rewards and optional rescues, use Hard Cases, Supply Caches and secondary objectives.
1 · Hope and Ruin
Story spoilers · open to readOpen Hope and Ruin: route, encounters and pickup pauses
Reported route: leave Fort Vigil; when downtown is blocked, go east around the cathedral and through its far gate toward the rail route.[4]
The map district includes the hotel, cathedral, university and Opera House.[2]
At the ruined church, Stewart damaged a chaingun Boomer with explosives, then chainsawed it from behind for Okay, Boomer. He did not prove that rear approach is required.[5]
For completion, review this district’s optional objectives before taking the transit route. An achievement opportunity is a detour; surviving the encounter comes first.
2 · Technical Difficulties
Story spoilers · open to readOpen Technical Difficulties: route, encounters and pickup pauses
For a refit stop in this chapter, open the subway cache photographs and compare the station's landmark with your current route.
Reported route: the first train is the wrong line; wait for the next train to Octus Way. When the cars fail, advance to the front section.[4]
At the first train-stop fight, collect Aman Landry’s tags before departure; later check the right track tunnel for the poster.[2]
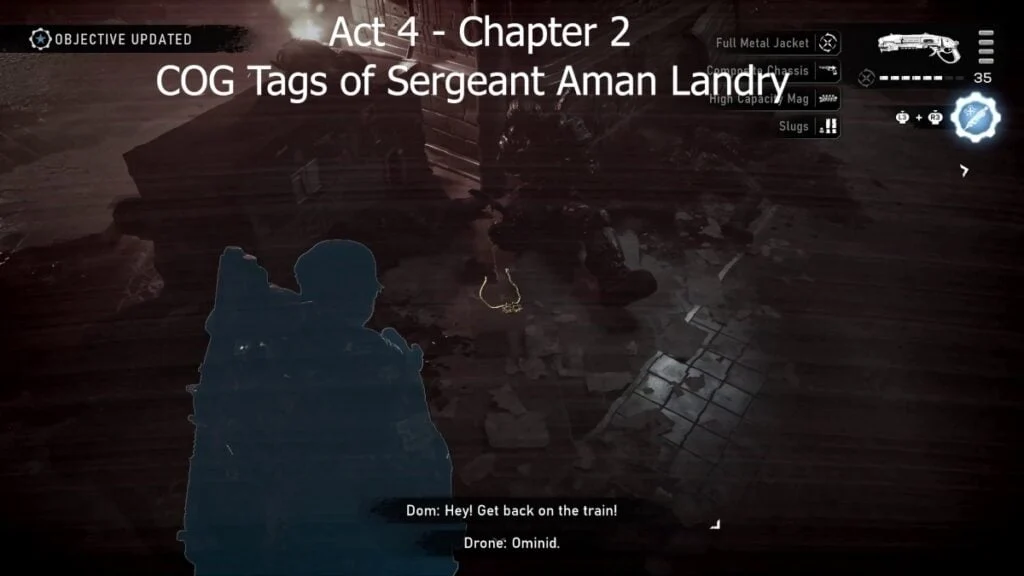
Use the brief stop for the tags, then return to the active objective. During the failing-train sequence, avoid turning an urgent advance into a complete enemy-clear attempt.
3 · Tough as Nails
Story spoilers · open to readOpen Tough as Nails: route, encounters and pickup pauses
For the recorded warehouse reward, follow the Ricochet Ammo case route. The power-station cache has a filmed approach and menu.
Reported route: Prospect Bay communications need power. Prepare the available sentries, defend the repair, then return to port control and clear its occupants.[4]
The published gameplay capture’s civilian subtitle instructs the squad to close the breaker when grid demand is met, requiring at least 85% output. It confirms the threshold, not the current output shown on a generator.[3]
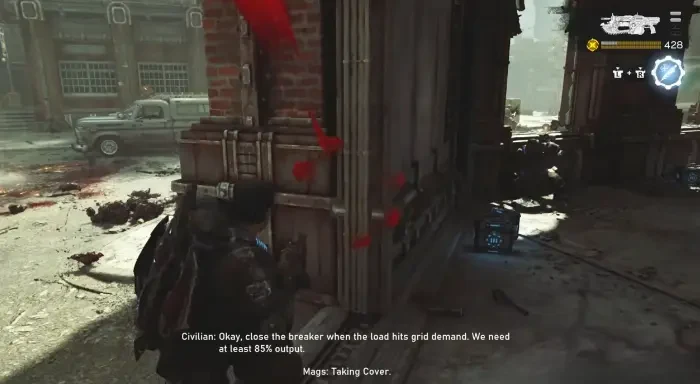
Check the train yard and factories before the final tower-console objective. The Imulsion Blast Charge follows a northeast side mission.[2]
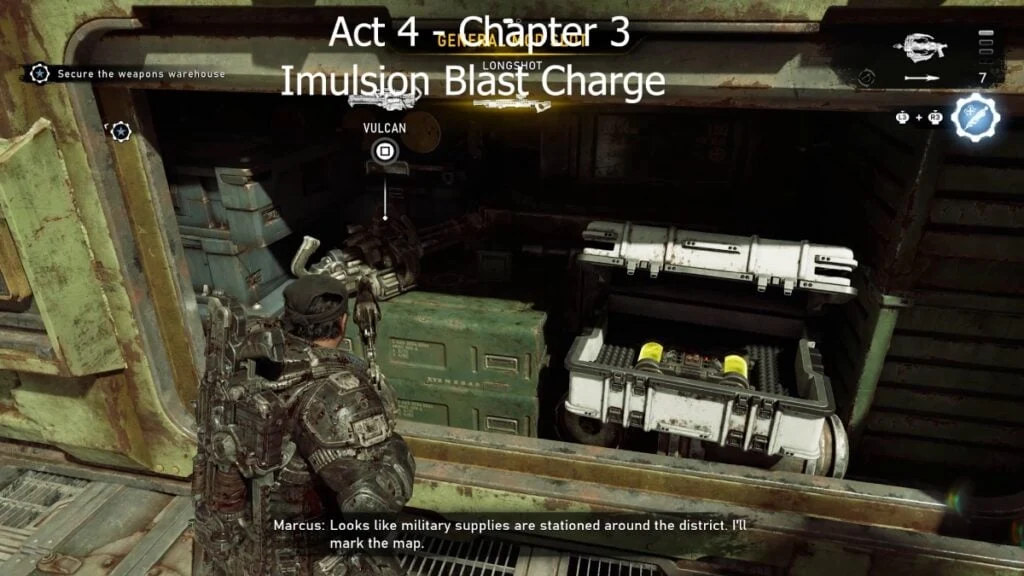
See the recorded container ending in Special Cargo.
During the repair, protect the technician’s approaches and wait for the output instruction. Afterwards check the live objective: restoring power and securing the communications site are separate tasks.
4 · Signals
Story spoilers · open to readOpen Signals: route, encounters and pickup pauses
Reported route: after the uphill ride and first fight, leave the road on Reyes’s trail and climb to the old weather station to contact command.[4]
Sweep the gas station and comms tower; both Lucas pickups are inside. Binoculars follow it.[2]
A stopped vehicle route does not always need a new vehicle. Check the indicated footpath, then pause inside the communications building for its paired pickups.
5 · Paths Diverge
Story spoilers · open to readOpen Paths Diverge: route, encounters and pickup pauses
Reported route: secure the administration building, broadcast the civilian evacuation over its PA, and hold until the message finishes before entering the refinery.[4]
Pickup pauses: Aniyah Musa at the chapter start; Ava Wilson at the final reactor approach.[2]
When protecting a broadcast, remain within a position that covers the active task. Follow its completion cue before leaving for the refinery.
6 · Critical Failure
Story spoilers · open to readOpen Critical Failure: route, encounters and pickup pauses
Optional upgrade: recorded Hard Case.
| Video | Objective / obstacle |
|---|---|
| 1:57:13 | Locked catwalk: take the left hatch and backup coolant pipe. |
| 1:59:19 | Broken staircase: seek the restricted-area research-lab elevator. |
| 2:02:52 | Get Zone 5 access; regroup and reach the labs. |
| 2:07:30 | Investigate the control pad and deliberate enriched-Imulsion intake feed. |
| 2:09:41 | Fight the large enemies at the converter; recorded gunfire reduces their bars. |
| 2:11:30 | Mags needs the other enemy down before handling the converter. |
| 2:13:19 | Mags dumps the tanks in the story sequence; leave with the squad. |
The route’s actual gameplay image shows Find a way to reach the core / Cross the pipeline. It does not show a close-up identifying the claimed left-side hatch.[7]
Before the refinery boss, check the final room for Dalia Fabbri’s Research Journal.[2]
Ben-Gun labels this encounter Scoria in his boss compilation. This is the creator’s identification; an official species name or boss classification is not established here.[8]
The loudspeaker warns of 80% pressure at 1:54:57. This successful run does not demonstrate a countdown, a failure threshold or a pressure-reset interaction.[6]
Use the displayed traversal objective to distinguish the route to the core from a locked catwalk. Before entering the final encounter, check the journal pickup and your supplies.
What this route establishes
Reported routes come from Whisper’s illustrated guide: its author and difficulty are unstated, and its sourcing policy allows research alongside gameplay. Named firsthand guides support the separate encounter and pickup notes.[9]
The 85% instruction and pipeline objective were read directly from published captures. Ben-Gun’s full Act 4 gameplay establishes the timestamped refinery route and successful encounter sequence. Earlier train selection and PA notes remain publisher-reported; pressure failures, numeric damage and difficulty-specific tactics still need testing.
Advice labelled Editorial is our planning suggestion. It does not establish a required weapon, a fastest route, an enemy health value or a difficulty-specific strategy.
Sources & further reading
- Published campaign order: all acts and chaptersWhisper of the House · October 2, 2026
- Act 4 collectible locations with gameplay screenshotsThe Nerd Stash · Julio La Pine · October 2, 2026
- Gameplay subtitle capture: at least 85% output for the breakerPublished by Whisper of the House · capture author not stated
- Published illustrated Act 4 route and power-station subtitle captureWhisper of the House · October 2, 2026
- Firsthand Act 4 cathedral Boomer chainsaw opportunityGamer Social Club · Adam “Addy” Stewart · October 1, 2026
- Act 4 recorded gameplay: Critical Failure traversal and converter encounterBen-Gun / YouTube · October 2, 2026
- Gameplay objective capture: cross the pipeline to reach the corePublished by Whisper of the House · capture author not stated
- Creator’s named boss chapter index (same gameplay recut, not independent confirmation)Ben-Gun / YouTube · October 2, 2026
- Publisher editorial and sourcing policyWhisper of the House